 Hello lovely friends! This is Becca dropping by to chat with you about one of my favorite hosting dishes! I am super passionate about hosting and gathering around the table with good friends and delicious food! My husband and I welcome in a group of 13 of our friends and their kiddos for a meal every other week. We pack everyone into our tiny little home [no kidding — only 2 bed, 1 bath — but we don’t let that stop our “come one, come all” mentality] and squeeze everyone around the table. Sometimes [many times] our meal consists of delivery pizza on paper plates, but occasionally we like to kick it up a notch. I like to have some go to hosting recipes that can be created easily but also deliver delicious flavors! And that is where the charcuterie board comes into play. It is a crowd pleaser [I mean, who doesn’t like cheese?!], it offers abundant variety, and it has great visual impact! It’s the perfect way to start any meal, whether you are hosting a crowd like we often do, or just an intimate dinner for you and a loved one. I’d love to walk you through, step-by-step how to create a charcuterie board that will have everyone coming back for more!
The cardinal rule of charcuterie boards is to start with amazing cheese. Not all grocery stores are set up the same, but in my experience there are usually 3 sections in a grocery store where you can buy cheese. First is the deli counter, second the dairy section where there are shredded sliced and blocks of cheese, and third a section of cheeses near the produce area. This third section is where I would suggest getting all of the cheeses for your charcuterie board. There will be a mix of both imported and domestic cheeses, but all will be a little elevated from your everyday block of cheese. Trust me on this one, cheese is the crux of the charcuterie board, and this is a sure way to make your board both festive and delicious!
There are lots of different types of cheeses, and you want to make sure to offer a good variety! Pick one from each of the following sections, and you’ll be sure to cover your bases:
Soft Cheese — Brie, Camembert, Goat, etc.
Semi-Soft — Cheddar, Gouda, Havarti, etc.
Firm — Parmesan, Asiago, Manchego, etc.
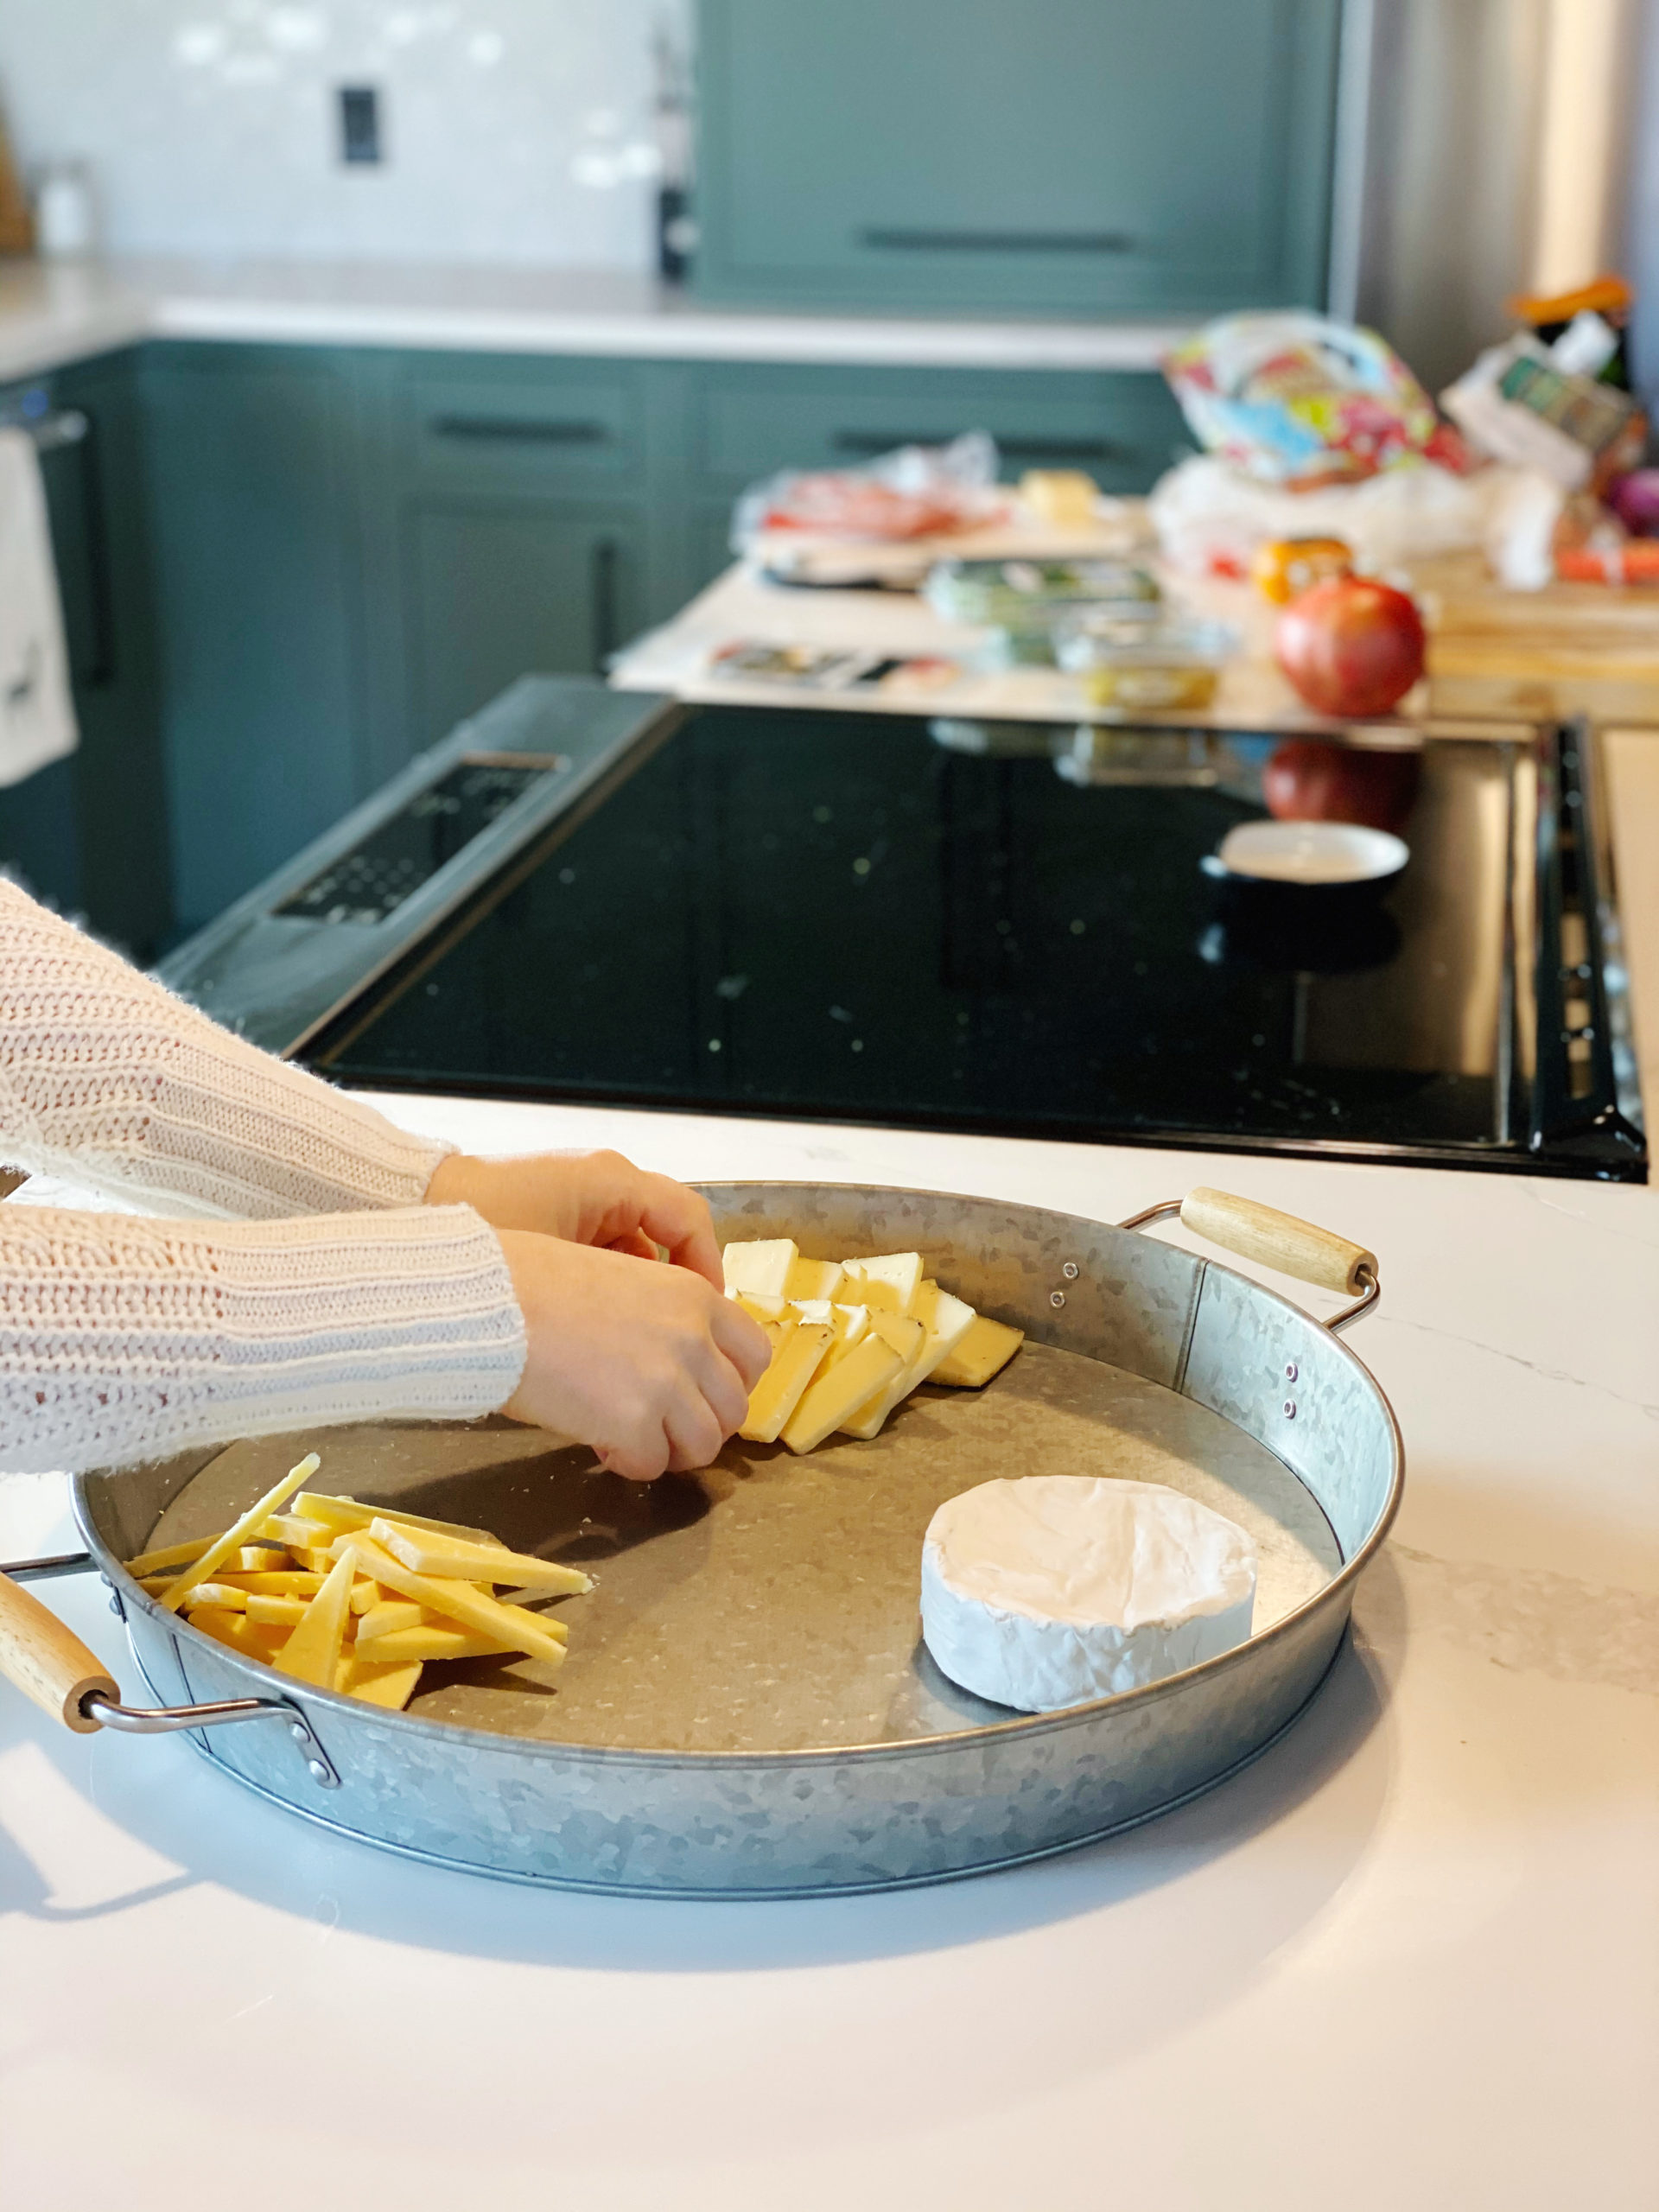
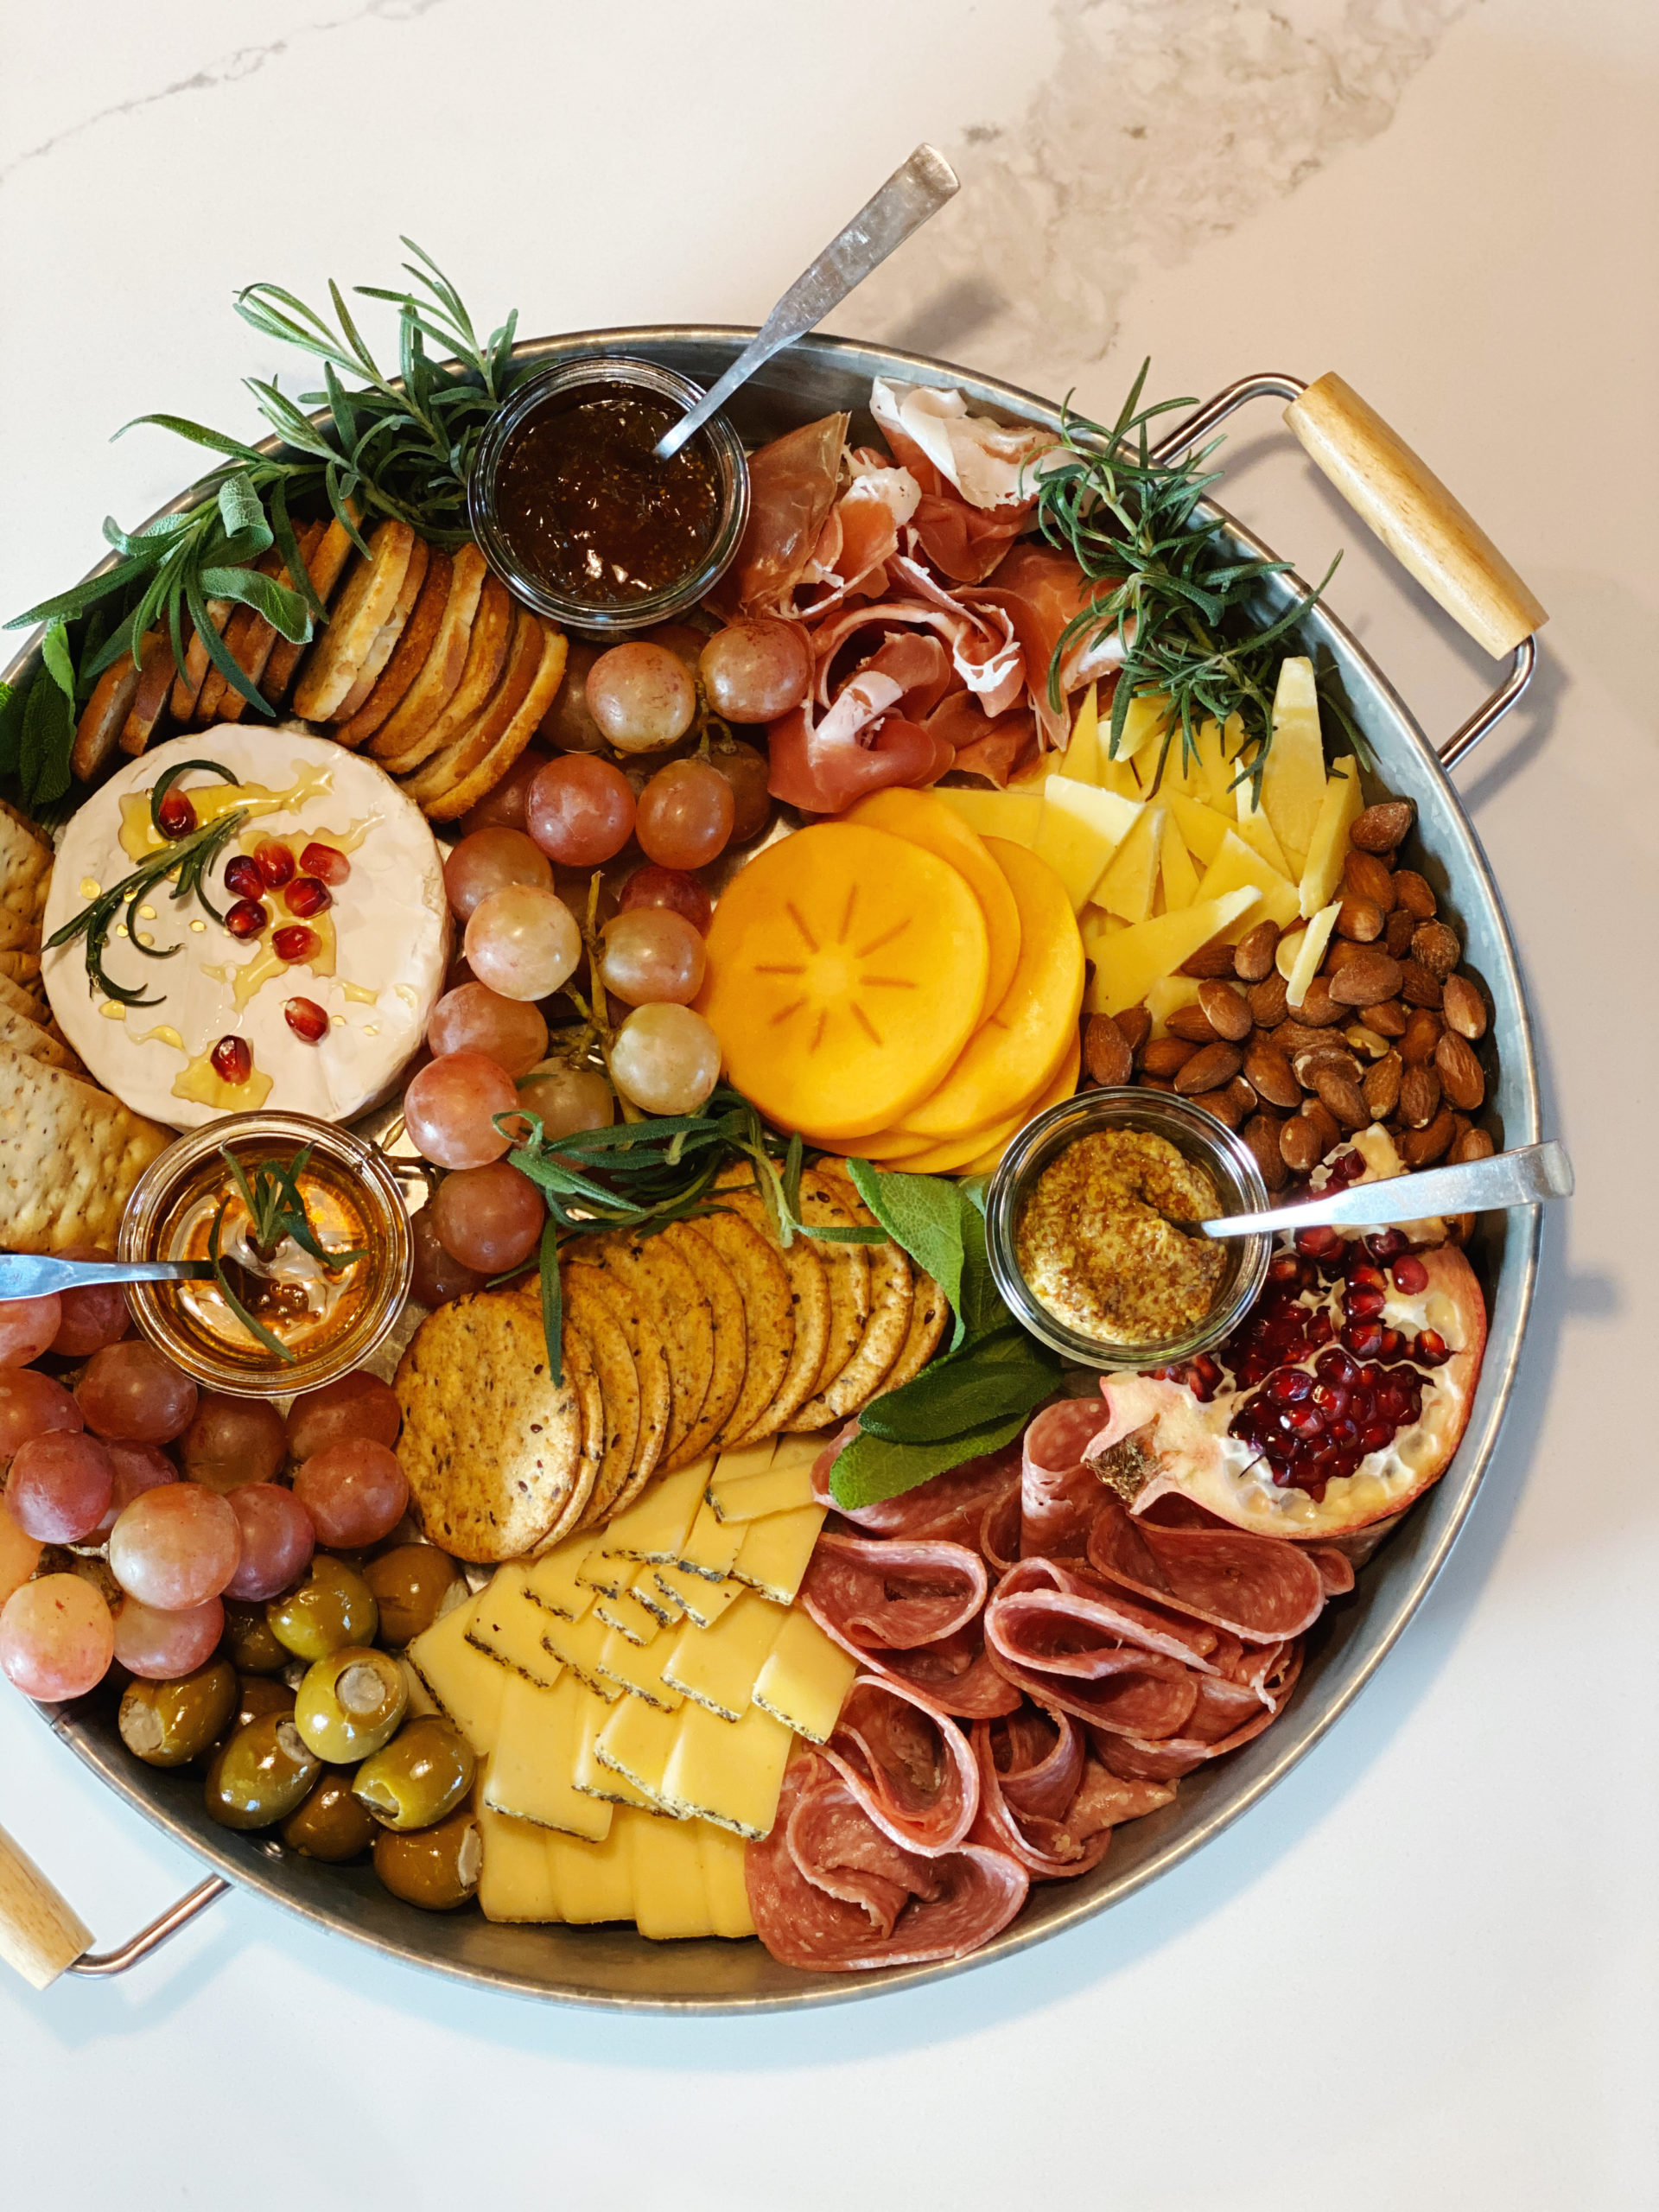
For our board, we chose brie as our soft cheese, an aged white cheddar as our semi soft, and a basil asiago as our firm cheese option. I sliced the cheddar and asiago and placed a little knife inside the brie for easy serving. Place your cheeses on your board first.
Note: You can serve your charcuterie on whatever board or tray you like. In these photos we opted for a tray with sides so that it could be easily carted from the cabin to the office without spilling. If you need to transport your board, this is definitely a good way to go!
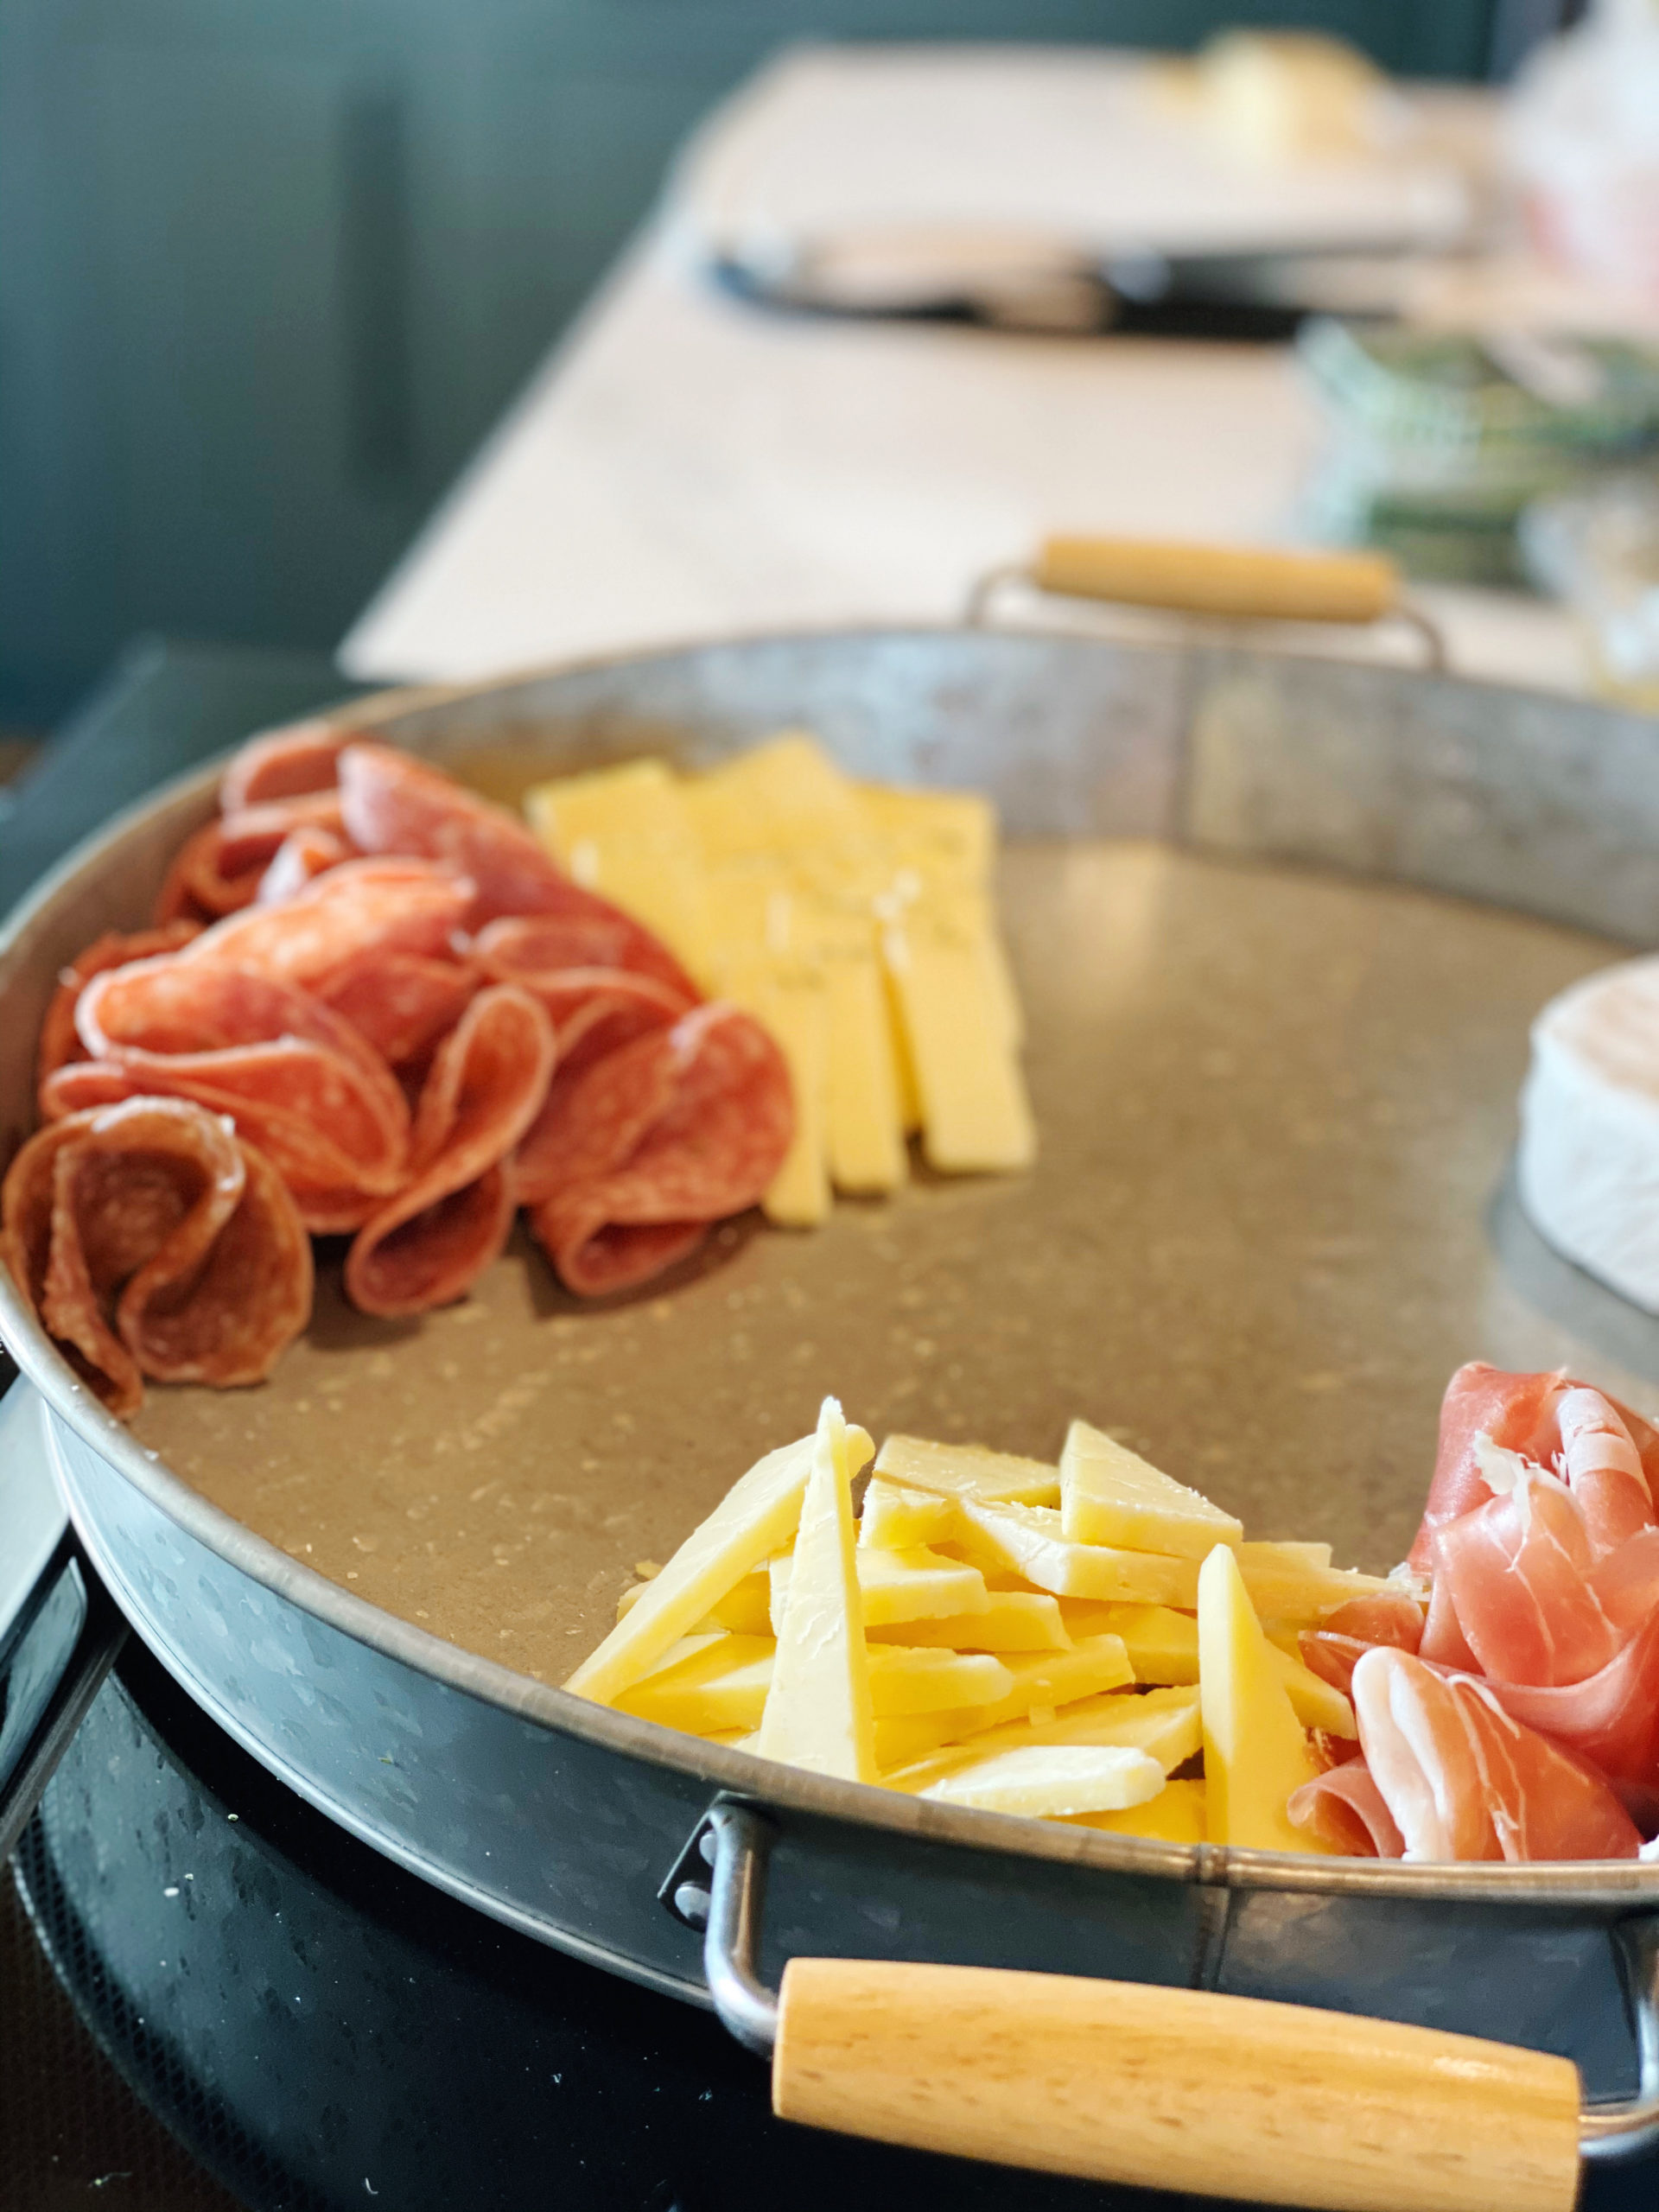
The next step in creating your charcuterie board is to choose your meats! Pick 2-3 options and add them to your tray or board. Consider choices like prosciutto, salami, pepperoni, or even bacon! We opted for prosciutto and salami on our tray and placed these next to our cheeses.
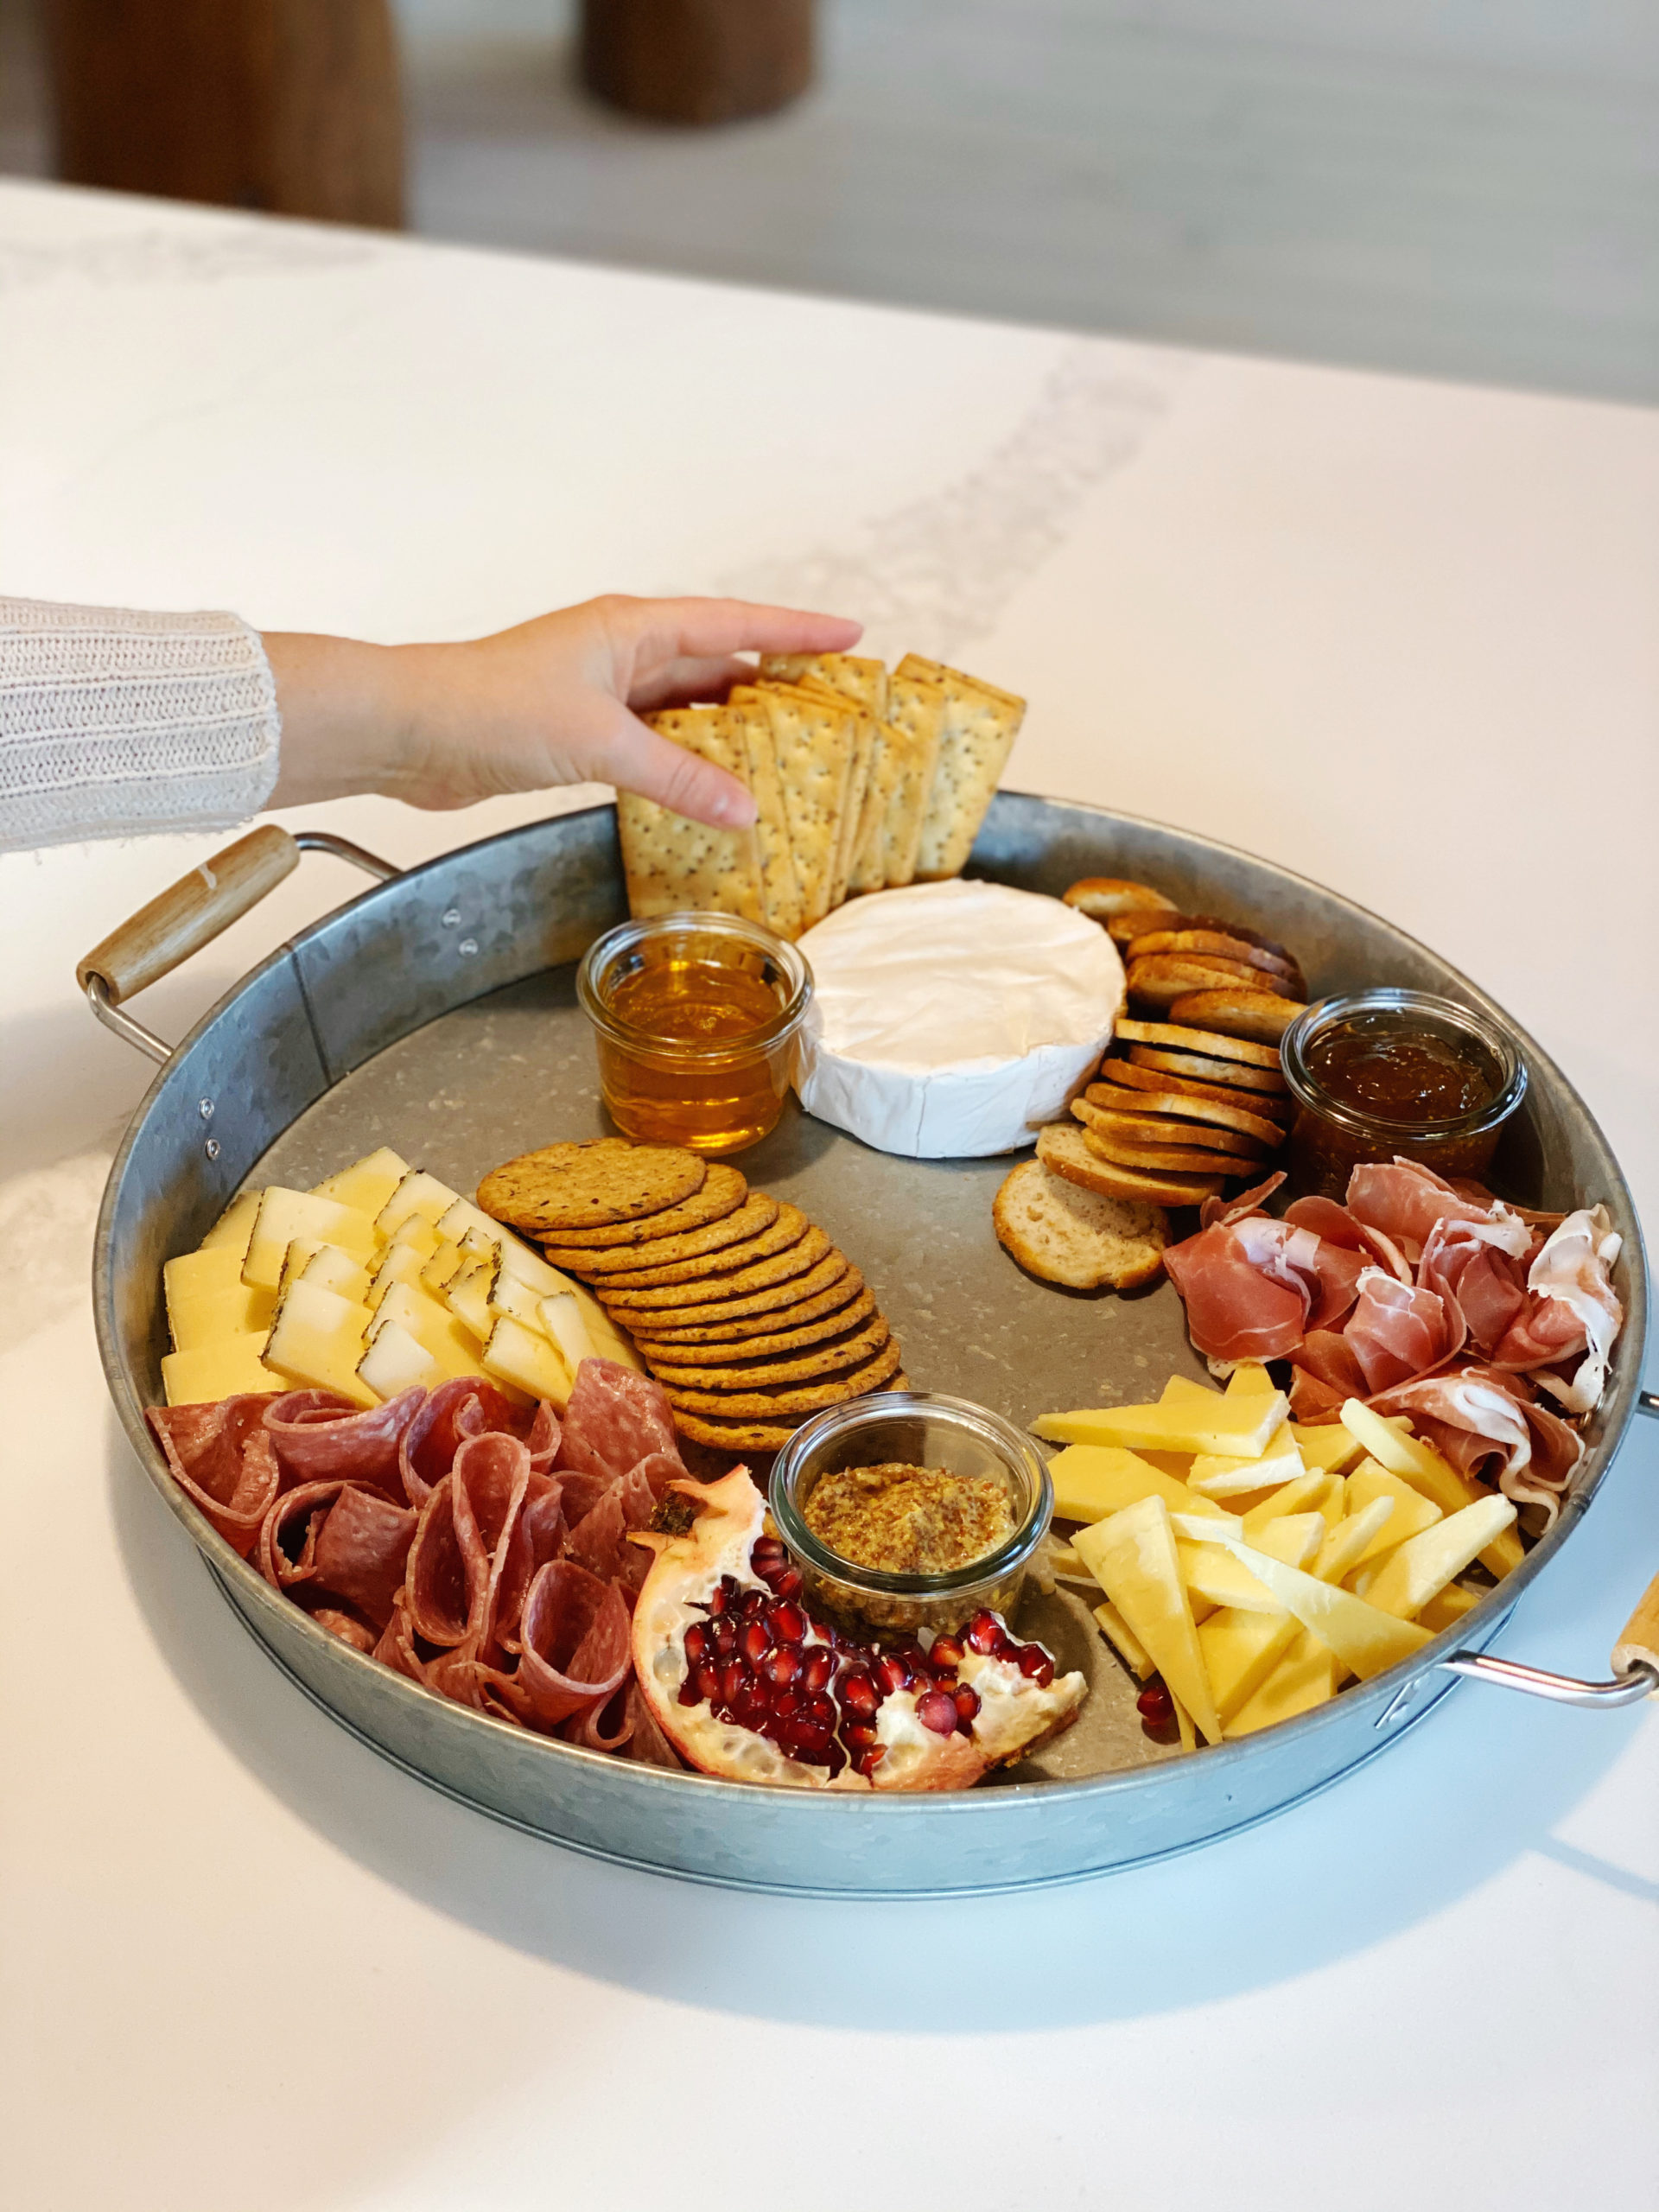
Next comes the crackers or bread. Don’t underestimate the value of the crackers! They are the foundation of every bite from the charcuterie board! I usually get my crackers from the same section of the grocery store where I get my cheese. This area will usually have a small selection of crackers and crisps that are a little elevated from the classic Ritz. We opted for 3 different shapes, textures and sizes of crackers to add variety to our board.
Place your crackers and then move onto the next step, the condiments. Every good charcuterie board has condiment choices! From mustards and hummus to honey and jams, these savory or sweet drizzles and schmears take meat and cheese to the next level! We opted for a whole grain mustard, honey and fig preserves on our board. Each was placed into a little jar and set onto the tray with a little serving spoon.

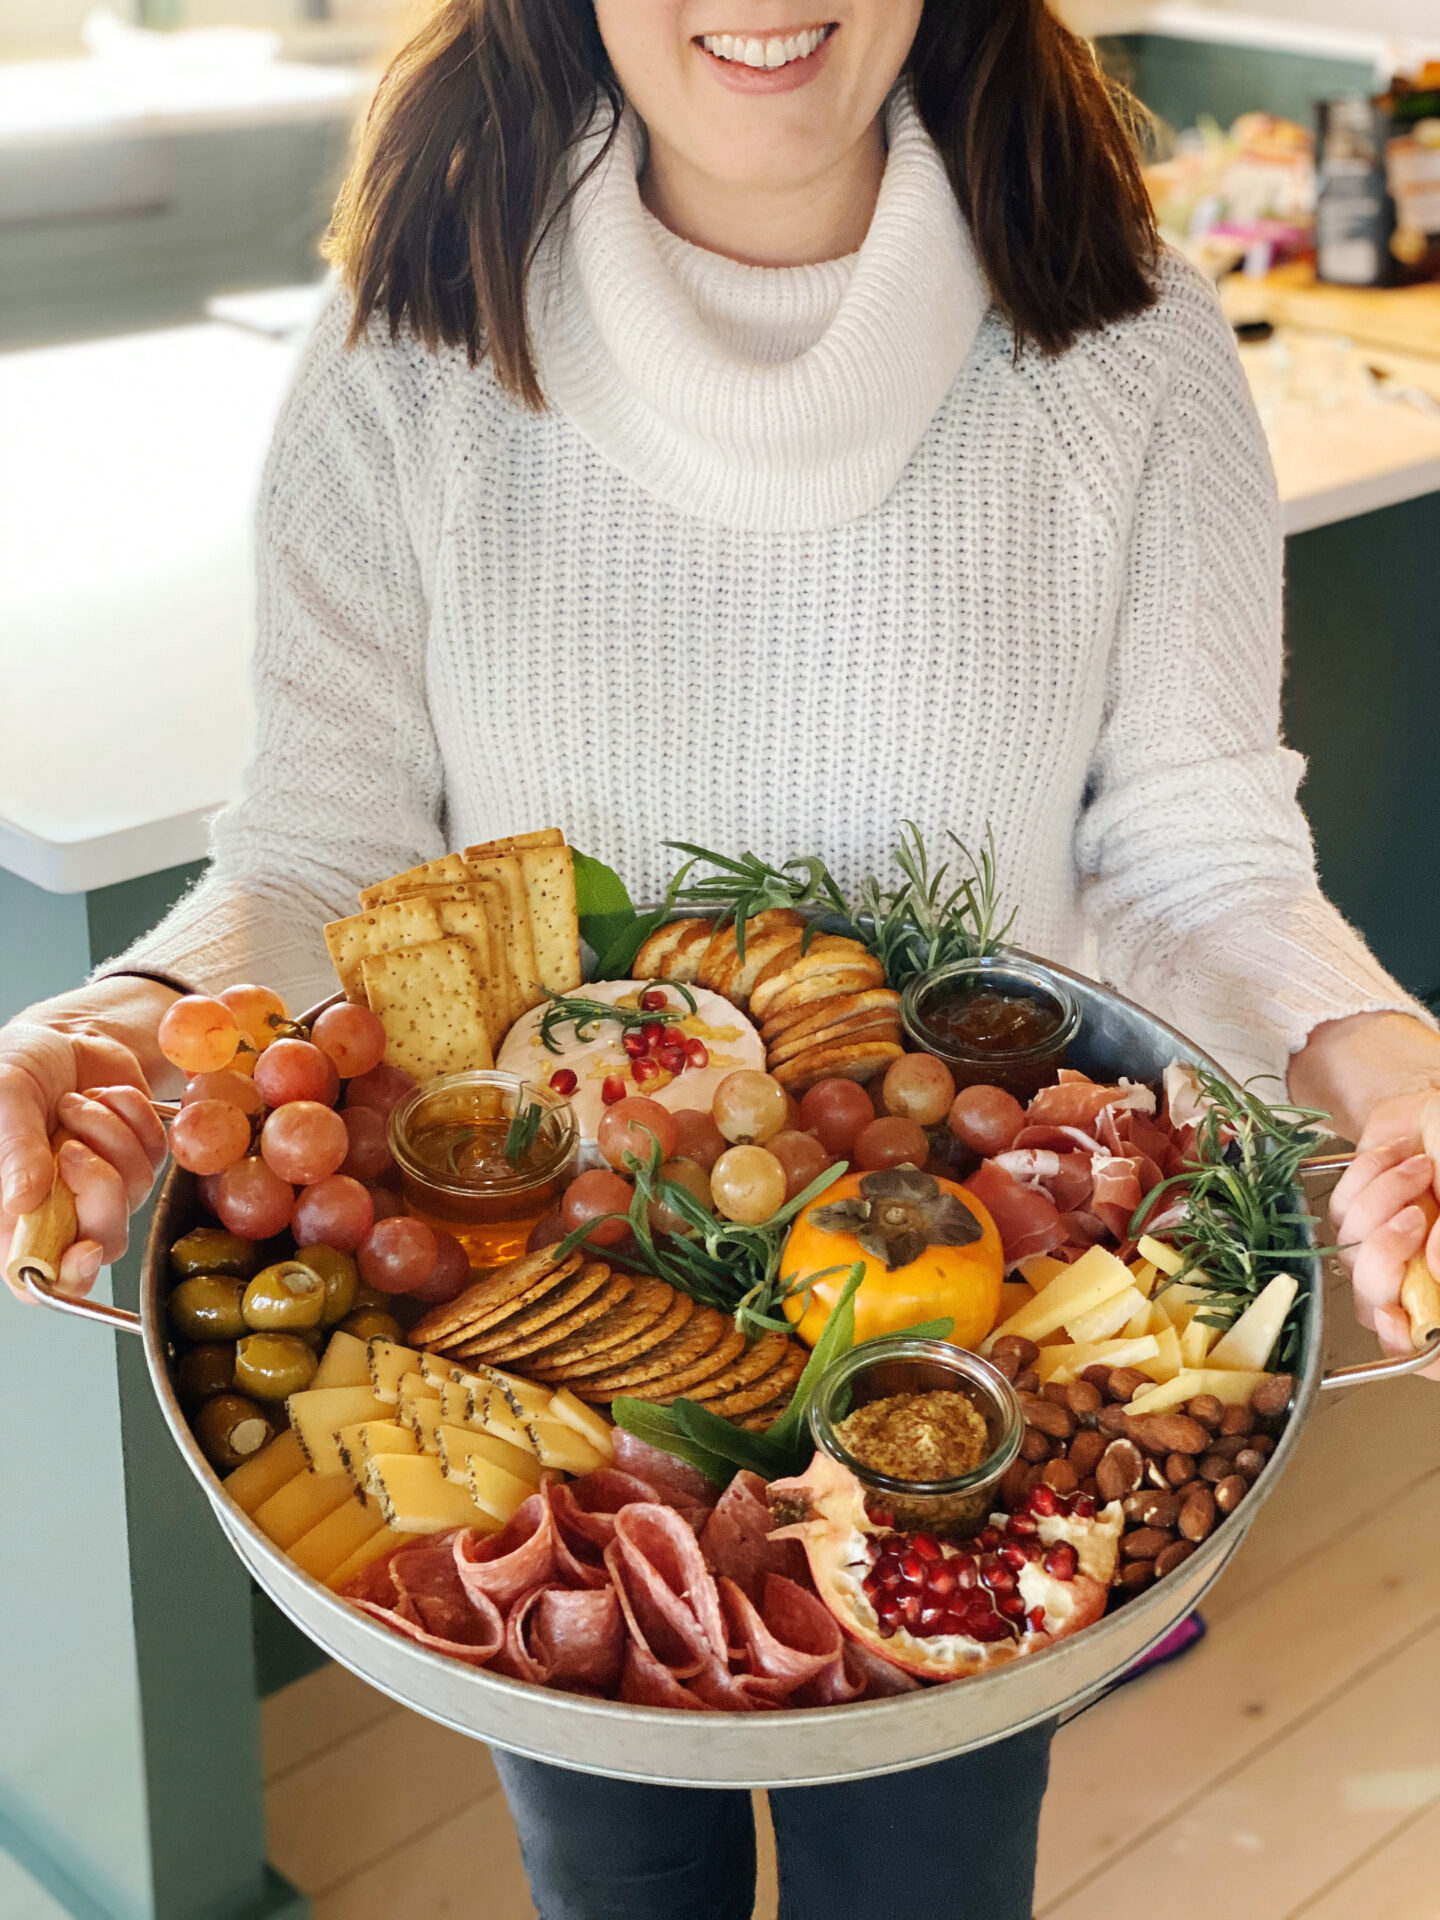
One important quality of every good charcuterie board is abundance. Don’t leave any space unfilled! That’s where the next step comes in, with what I am calling the accoutrements. These things fill the space, and while they are not the star of the show, they certainly help to create great flavors and add to the overall look of abundance. Consider options like fruit, veggies, nuts, olives and so on. For our board, we added grapes, pomegranates, slices of persimmon and a pile of almonds with sea salt. When you are done with this step, there should not be any more empty spaces on your board.
Lastly, finish off the look with garnishes. Fresh herbs are the way to go here! We used sage and rosemary to add an enticing aroma and a little pop of flavor for topping a bite from the board! Time to dive in, your charcuterie board is complete! It makes a great visual impact, and honestly the whole thing took 10 minutes from start to finish!
Hope you have enjoyed this little how to, and that it inspires you not only to create some beautiful and delicious charcuterie boards, but that more importantly it draws you to gather those you love around the table and enjoy connecting over a meal together!